Adding a secondary motion factor to a rig using constraints
By Michael Malinowski
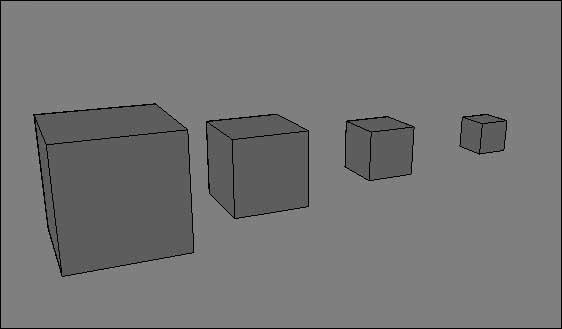
I will start from the very beginning, so we can see the problems and benefits. So to begin with lets create a cube, duplicate it, move it and scale it, then repeat the process so you create something similar to the following image.
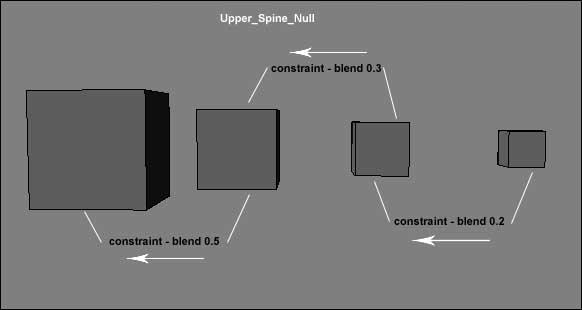
Now enable constrain compensation, and choose constrain pose whilst having cube2 selected, then select cube1, set the blend to 0.5 ( this is the strength of the constraint), now choose cube3, select the constraint and select cube2 ( set this blend to 0.3) and so one, so cube2 is constrained to cube1, cube3 is constrained to cube2, and cube4 is constrained to cube3.
Now if you rotate cube1 you will notice that the constrained cubes all follow behind in a delayed motion, so already were beginning to make use of secondary motion. However, we can quickly spot a problem with this setup.
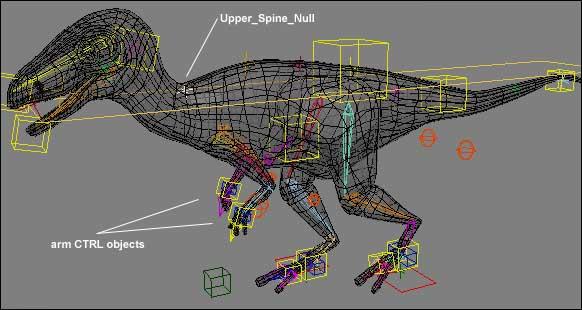
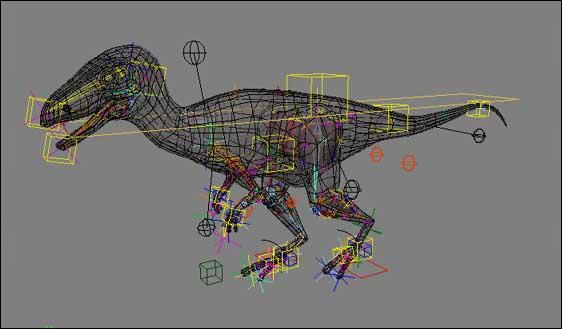
What if
we wanted to set this secondary motion on the arms of a dinosaur, so that
when it walks its arms bounce up and down automatically, we could do this
using the above setup, however we would have no control over the arms as
they are now constrained to another object which gives us little scope for
animation
Luckily for us the solution is equally as easy to setup, take
a look at the image to the left, this is a basic setup whereby there is no
secondary motion in place for the arms, and the arms are currently
children of the upper spine.
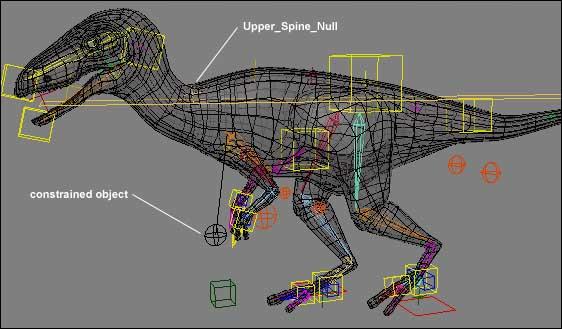
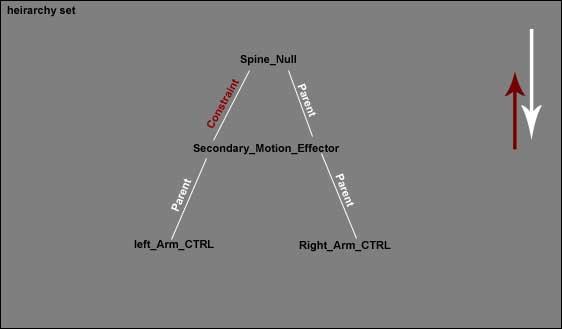
Now if
the dinosaur moves you will notice that the object we just constrained
moves with an offset. All we need to do now, is make the new constrained
object a child of the spine so its all part of the same hierarchy, then
cut the parenting between the spine and the arms, and instead make the
arms a child of the constrained object.
Now if you move the entire rig
you will see the secondary motion apparent on the arms as these are
children of the constrained object, because of this they can still be
seperatly keyframed as they are in no way constrained.
This same method
can be used anywhere throughout a rig, it can be useful for things such as
arms, tails, heads, even skin.
With this in mind you can begin to think of the possibilities this gives!
click the image on the left to view the file.
if you have encountered any problems with this tutorial then please email . hejherbert@hotmail.com and i will try to resolve it. This was created using Softimage|XSI 3.0, but should run down to 2.0.
hope this helps.
Mike
Malinowski