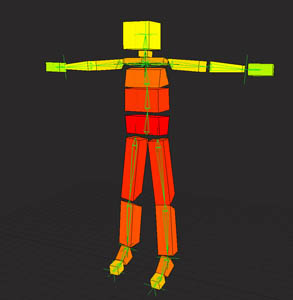
Once you have your skeleton set, create a cube, and pose constrain it to one of the bones, this makes sure that the rotation values of cube are exactly the same as the bone it will effect later, you can then remove the pose constrain from the object, and go into a component mode and adjust the shape of the cube. again, this is another factor you need to take into consideration, how much detail you will put into your rigid objects. Whether you want to keep them as cubic as possible to save simulation time, or add more geometry to them to gain a little more accuracy.
Repeat this step for each bone in the skeleton. Once you have that you should have in front of you a polymesh figure resembling the volume of your character, the closer the volume of hte cubes are to your main char, the more accuate it will look, and less manipulation it will require later.
You then need to set up a hierarchy on the mesh, in the same way that the hierarchy on the skeleton runs. So the forearm mesh for instance should be a child of the upper arm and so on, and try to keep the center of the cubes as close to the center of its relative bone as possible.
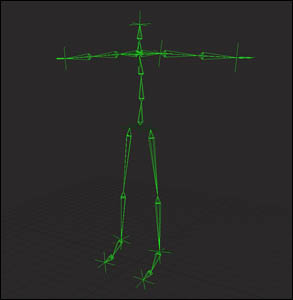
Also position constrain the root of your skeleton to the root of your rigids, else your bones will only rotate, and your overall skeleton will not move in position.
Now orient constrain each bone to its relative poly mesh part, so that the bones are being rotated and pulled around by the mesh.
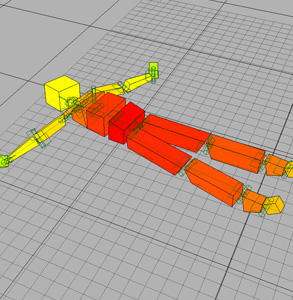
Then select all the mesh objects around your skeleton, and choos to create active rigid bodies with them. Now we must begin to set the constraints betweem the limbs and the rest of the body, for the most part you will need to use hinge constraints, as a lot of the bodies joints rotate on a 2D plane.
To do this, for instace, select the lower leg object, choose "Create / Rigid Body / Rigid Constraint" then it will give you the picker object, and you then select the upper leg, this then creates the hinge constraint between the two objects, where you can choose your rest angle etc, and springyness, along with a bunch of other parameters. Set these up as desired, and do the same for all the other limbs that rotate on a 2D plane, be sure to check the collide option, so that the mesh objects will not parse through each other.
for other areas such as the connection between the upper arm to shoulder, and the neck to head etc, you can use the ball joint constraint, and again adjust the spring and dampening to suit your shot.
Once you have the motion that you desire, then select all the bones in your skeleton and the root of your skeleton which you applied the position constraint to, and press 2 to go into animation mode, here you can plot the transforms of those objects, this then takes the motion of the bones and root which are being pulled around by the rigids, and turns that motion into an fcurve, once this is done, you can remove all the rigid body mesh, and your skeleton will then make that exact same motion without the need for its rigid counterparts.
From here its just a case of transfering the animation from your low res skeleton onto your main rig, this can be done in a multiple of ways, you could export it as an fbx, and if your names are all the same, when you import the fbx into your main screen, select the option to merge and your animation should be transfered onto your main rig. If you dont want to use this method, then you can treat it like any other motion capture data, and make a short script to simply transfer the animation of one rig over to another.... or of course, you *could* do it manually, though this could take some time.
Once you have done all this, you should be able to hit play, and watch your high res character take on the motion that your rigid body character took on.
Hope that explains one method of using rigid dynamics for character animation.
Mike.
hejherbert@hotmail.com